Monthly Archives: December 2009

15 ways to sell your artwork

There is nothing better as an artist than to see someone display your work and to know that they love and appreciate it. Whether art is a hobby or you earn a living with it, there are always opportunities to sell your art. If you are struggling with how to go about it, the ideas below can be combined to create your own strategy for marketing your work.

Artist Cards, Editions and Originals (ACEO) – use as business cards to promote your work. Your original art on the front, your contact & product information on the back.

• Bookmarks – again, use as a business card with your art on one side and your information on the other.  Bookmark tassel and sleeve sets can get you started.

• Promotional pieces – T-Shirts, coasters, mugs, etc. – Check out Cafe Press.  Wear your art – “mobile marketing” – then hand out an ACEO or bookmark when someone is interested in your art.

• Mail your art
– Use postcards of your art to advertise your work, sell sets of postcards or give as gifts
– Envelope art – advertise as you send out your mail

• Sell prints. These days it is easy. Fine art printing companies are widely available on the Internet and elsewhere. Many of them do digital capture as well as the printing itself.

• Develop a blog or your own online gallery. At a minimum, get a simple web page where people can view your work and contact you – people expect this.  Get a free hosted blog at WordPress.com. If you decide you want your own website, check out free web hosting here, then get free blogging software for your website at WordPress.org.

• Sell on eBAY or ETSY – great places to sell your specialty greeting cards or even original art. List your work on eBay to appeal to consumers who don’t have the time or inclination to pay gallery prices. Set a reserve price that assures you’ll get a decent return on your time.

• Art shows – This can be a great way to get your work seen in the local market. Galleries often host these shows, so they do all the advertising. See our recent blog article for information on shows and how to prepare for them. To find shows in your area you can go to festivalnet.com, or Google “craft show index”.

• Set up a booth at your local farmers market, flea market or swap meet to sell your work. This can be fairly inexpensive.

• Ask to have your art displayed at local libraries, restaurants, Barnes & Noble in the café area, etc.

• Sell through an online artist cooperative.

• Network – join museum or artists’ groups and local business community groups.

• Enter competitions.

• Display or sell your work at church & temple bazaars and holiday boutiques, convention centers and community centers.

• Approach companies that will sell your product. Just because you are an individual, don’t assume that companies won’t want your product. Check out Lady Bones.

How do I measure my artwork for matting?

By David Heyman

A mat makes any image look more professional. Even without a frame, simply matting your photographs or artwork will do wonders for the presentation, and sales potential, of the work.

Although mats come in many standard sizes, if you are working with custom size images, or anything that is done on a paper that is a creative size, your mat will need to be custom cut. Oak Creek Printworks offers custom cut mats, at a cost relative to a standard size mat, with no extra charges.

How to give the correct measurements for a custom mat is one thing that many artists find confusing. Since custom cut mats are cut to order, it is important to have your borders and window measurements accurate. While you can always call David, our custom picture framer, at (805) 390-4955, with any questions on sizing of borders and windows, the following is a guide that will give you reliable results:

  • Measure the outside edges of your image. Do not assume your image is a certain size. You may have ordered an 8″ x 10″ photograph, but the image actually measures 7-7/8″ x 9-7/8″. If you are matting artwork on paper with an uneven edge, such as a deckle edge, measure the narrowest part of the horizontal and vertical sides, as shown in this photo.

* Add photo of deckle edge watercolor paper, showing w/ ruler how to measure*

  • Decide if you want even borders for your mat, or a weighted edge. Some people feel that having the bottom border of the mat slightly wider makes the image seem more centered when viewed from a distance. This is called an “optically centered” window.

CenOPCenMats2

  • How wide do you want your mat? A narrow mat allows the image to stand out more and can fit a tight frame. A wide border gives the work dramatic presence and can transform a small image into a large piece. Whichever you decide is up to you, it is just a matter of personal taste. Here are examples of both styles:

NarrowWideMats

  • When you have this information, perform these two simple calculations, and you are ready to go: To get the outside dimension of the mat, add the horizontal dimension, the width of the mat and the width of the mat again. For example, if your image is 8″ x 10″, and you want a 4″ wide border, add 8 + 4 + 4 = 16″. Do the same with your vertical dimension, in this example – 10″ + 4 + 4 = 18″. So your outer mat dimension is 16″ x 18″.

OuterMat

  • The second calculation is your window size. That is simply your image size, minus a slight amount for overlap. Since the window will cover the edges of the image, it needs to be slightly smaller than the artwork. We recommend a 1/4″ overlap, which will allow enough room for overlap and attachment to the back of the mat. In our example, with an 8″ x 10″ image, your window size would then be 7-3/4″ x 9-3/4″.

Print

With practice, this process becomes second nature, and can be quickly transformed into a host of eye-catching sizes for all of your pieces. Taking a little time to measure your own custom mats can save you much time when preparing your shows and matted prints. Which will then give you more time to do what you do best – creating!

Artist Trading Cards

Artist Trading Cards
Art Card Editions (ACEO)

Give an Art Card, Edition or Original, as a Stocking Stuffer
By Trevor Mauk

Countless artists today are trying to find new ways to have others experience their art. Many of them have turned to the Internet, and have had great success.  But a new, easy way to have your art in the hands of others is becoming more and more popular. Artist Trading cards, or ATCs, are opening a new world of artistic experience to both experienced and amateur artists across the world.

ATC-studio watercolor-setup

Artist trading cards were created in 1997 in Switzerland by Michael Leavitt, who was inspired by the idea of baseball trading cards. They are approximately 2.5 by 3.5 inch cards with an original piece of art that is created directly on the front, and with information about the artist who created it on the back. The individual cards are typically originals or part of an edition. The medium that the art is created on is limitless. Drawing, painting, photography, and three-dimensional objects can also be used on the cards. The only limitations for creating an ATC is that the card must be 2.5″ by 3.5″, and flat enough to be put into an envelope. Past these rules, the potential is endless, opening a wide range of possibilities for artists creating them. The small size has also pushed artists to create something very different than anything they have made before on their typically large canvasses.

Artist trading cards were not created with the intention of making money, but rather purely to experience art from others and to be able to share your own art as well. Therefore, they were intended to be traded and not sold. There are websites dedicated to arranging ATC trades, such as www.atcsforall.com, to make it very easy to start trading and to become part of the ATC community. The idea of physically trading these original pieces of art either through person or the mail has made this experience so much more genuine than experiencing art on the Internet. Having an original piece of art at your fingertips is oftentimes much better than viewing it on your computer screen.

Many artists who create ATCs also create their own envelopes that compliment their piece. It is also a good idea to put them in clear plastic pockets for storage and shipping to keep them protected. There are also specially sized boxes made for storing ATCs safely. A photo-album is a good way to keep ATCs protected and to look at them easily too. Some artists have been very creative with how they show and store their cards, whether it be sewing a plastic window on their handbag to display them, or framing them to show in their home.

In a world where so many artists are trying to find a way to have their art viewed by others, artist trading cards have opened up a new way to share original pieces in an easy, genuine way. With the artist trading card community growing, it is sure to open up a new artistic experience for artists of all types across the world.

Angela M. Sharkey, Winter 2009/2010 Featured Artist

angela_sharkeywww.angelasharkey.com

Angela Sharkey’s eclectic style of art is constantly evolving as she brings her visions to life with an emphasis on color, design and texture.  Having a background in graphic design, she is always aware of balancing shape, color, and line in her artwork.  Working in a variety of mediums, she uses layers of various textures in her paintings along with her hand-designed stencils and her own richly colored papers. She invites the viewer to explore the rich and varied landscapes she creates, telling a story through her work.  Architectural elements, iron works, patterns and ornamentation are throughout her work as she freely manipulates and applies these designs, letting them influence her art.  Angela’s marriage of color and pattern weave a tapestry on the canvas as her visions take shape.  Frequently moving around the world, Angela is continually inspired by her new surroundings and how they affect her perspective on life; Angela imbues this reflection in her work.

In her own words

My love for art and expressing myself artistically is an integral part of who I am and I have been creating art for over 20 years.  My art career started as a graphic designer after I studied at the Milwaukee Institute of Art and Design and has evolved into painting.  My current répertoire consists of acrylic, mixed-media, watercolor, and pastel on a variety of surfaces. Deep edge canvases are my choice for painting; I love the fact that when I’m done I can paint the sides and have a painting ready to hang without framing.  Sketching my ideas, creating my own stencils, and hand coloring papers are all part of the process for me when I start a painting. The meditative act of stencil making and hand painting papers as well as sketching some ideas gives me a perspective and direction as to where my painting might go.

bijoux
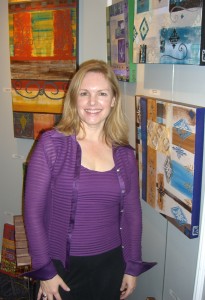
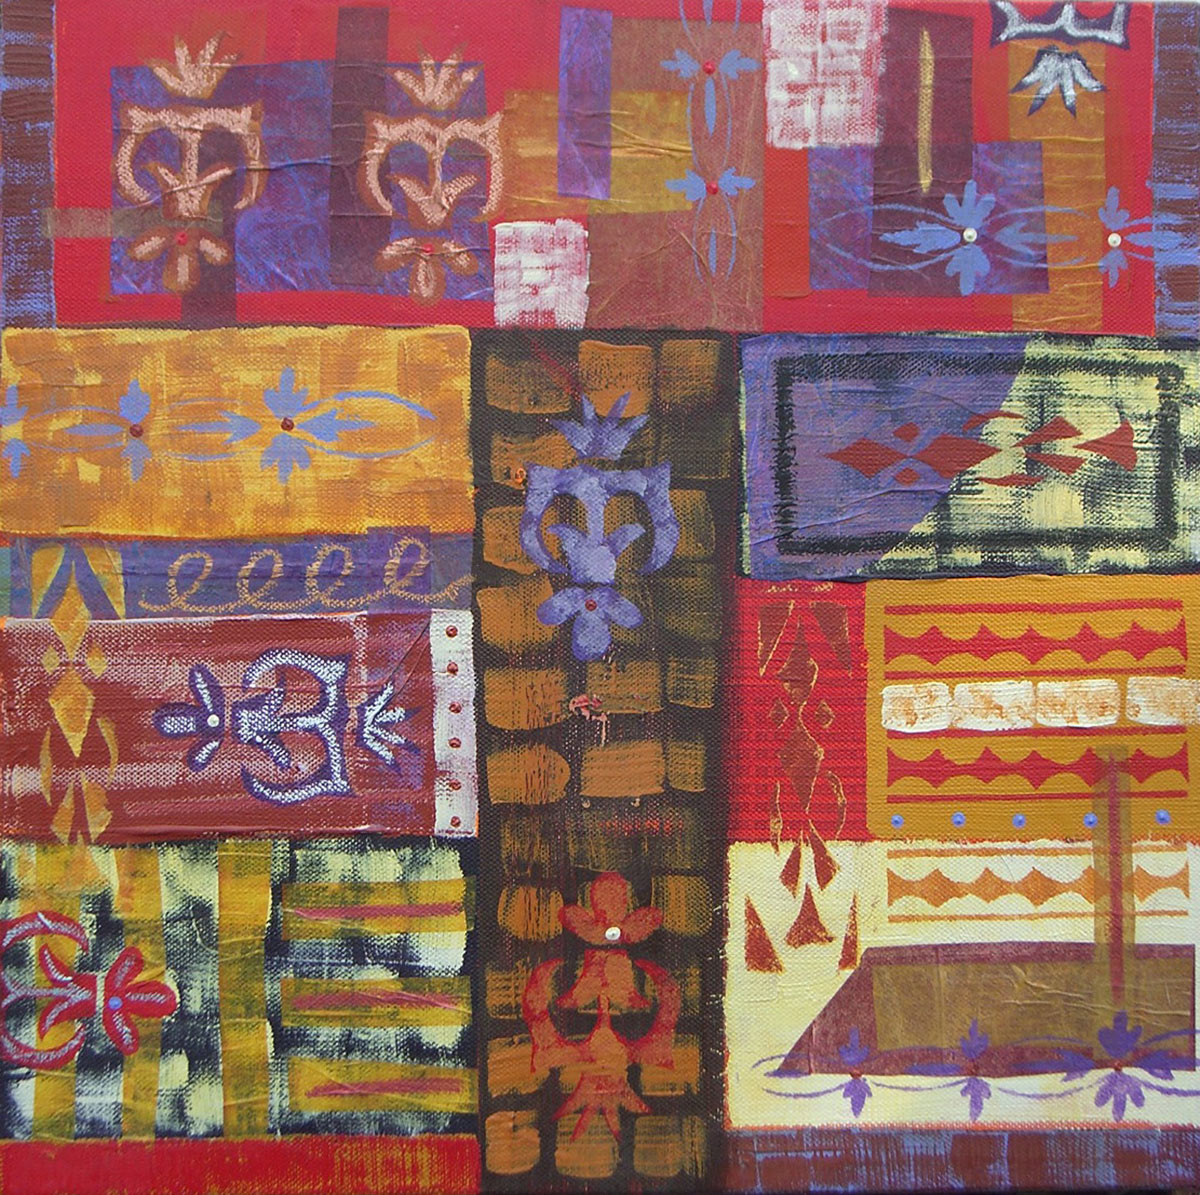
Mixed-media painting has allowed me to tap into my creative well unlike other forms of painting. I am always working towards a tactile and intricate appearance, so I use glazes, heavy body acrylics, and various gel mediums.  I like to use common objects such as a wine cork, plastic wrap, or a brayer  and experiment with bringing texture or even design into my paintings.  Building up a painting with many layers and then scraping or scrubbing away until I get the desired effect or look I want has been very fulfilling.  Inspiration comes from my daily life; whether it is beautiful architecture and all its elements, gorgeous colored flowers I see on a walk or historical design and pattern books–I absorb it all.  As much as I prepare for my paintings, I am still led by my emotions when I paint and I always succumb to my inner feelings.  I have also turned my art into my own greeting card line that I sell locally to friends and through the U.S. Embassy in Belgium where I am currently living.  My greeting cards are a reflection of my love for color and are illustrative and whimsical in nature.  Pushing my boundaries and experimenting as an artist, I really enjoy melding paint and graphic design together, which always leaves me wondering what I can create next.  I take an idea and let it evolve trusting the creative process and my intuition while being open to the unpredictable.  I have participated in group shows and art fairs in Belgium and my artwork is displayed in the United States and Europe.

Snowy-streetWeb waiting-for-mailWEB

THE ETIQUETTE OF LETTER WRITING

by Georgia Lange

etiquette of letter writing

Original artwork and design by Wendy Patterson of Cafe Baudelaire

etiquette |etikit; -ket| – noun
the customary code of polite behavior in society or among members of a particular profession or group


Several months ago, I was listening to NPR and tuned into a discussion about handwriting. It was under debate whether handwriting is a dying practice in the digital age of communication. People rarely write hand-written letters anymore; the vast majority simply send an email or a digital greeting card. As I listened to the discussion, my inner fine artist started to cringe; I remember hearing similar discussions at the School of the Art Institute of Chicago (SAIC) over the future of painting, museums, hand-drawn animation and so forth. Traditions live on because we as a society choose to honor them by continuing their practice. There is something special about the tradition of creating things with our hands, and it is important not to lose the little things (such as handwriting or hand-written letters) just because modern technology makes it so much easier for us. Whatever your craft, your hands are as unique as your fingerprints. What you create using them is just as unique as you are, and just as precious.

Sending a hand-written letter has a much more personal and classy touch than an email. There are many ways to turn your hand-written letters into something extra special. Try writing with a quill pen or sealing your letters with a wax seal. This adds an artistic element to your letters giving them a more vintage and romantic quality. Check out nostalgicimpressions.com for an excellent selection of sealing wax, seals, and quilled pens. If this kind of etiquette appeals to you, than you are truly an artist at heart. Creating your own greeting cards with your art on them is the best way to turn your letters into gifts.

Giving someone a piece of your artwork, be it a print or an original, is a truly special kind of gift because it comes directly from you, and it makes the recipient feel just that much more special. The same principle also applies to greeting and gift cards. Maybe there are people in your life that you feel you do not have a close enough relationship with to warrant giving them a gift, but you still feel the need to let them know you are thinking of them. You may also have friends who are spread out across the country to whom you cannot afford to ship presents, but you still want to wish them a happy holiday season. Sending a greeting card with your original artwork printed on it is similar to sending a fine art print on a smaller scale. If you have your greeting cards printed in a 4 x 6 or 5 x 7 inch size, the recipients can easily place it in a frame turning a simple card into a work of art that can hang on their walls. It is also cost effective and allows you as an artist to market your work and your talent. Save that box of holiday greeting cards that you bought on post-holiday sale at Barnes and Noble or Borders last year and make your greeting cards more intimate and personal with a touch of the artistic and a touch of you.

The Benefits of Archival Mats

by David Heyman

The function of a mat is to give breathing space around your artwork or photograph, letting the eye have a place to “rest” while taking in the image. A blank, neutral mat border surrounding the work adds class and transforms what could be a snapshot into a real work of art. Notice the transformation of this image from a plain poster frame, into a professional, gallery quality display, just by the addition of a mat.

The image on the left looks like a decorative poster, while a mat instantly transforms it into a work of art.

The image on the left looks like a decorative poster, while a mat instantly transforms it into a work of art.

Mats come in many shapes, sizes, colors and textures. However, one crucial element  is often overlooked when selecting a mat: whether or not it is archival in quality.

The majority of mats on the market today are made from wood pulp, the same substance used to make mass-produced paper. While paper products made from wood pulp are inexpensive and abundant, their use in displaying and protecting artwork is limited, due to their rapid decay and discoloration.

Wood fiber contains lignin, an acidic substance that is a cellular component of trees. When that fiber is made into paper, including mats, the lignin remains in the finished product, making it a ticking time bomb for eventual disintergration.

Acid causes mats to yellow, staining your artwork in the process. Gone unchecked, a paper mat will eventually turn brown and become brittle, spreading acid burn on to your work. While substances can be added to the paper fibers to slow down the deterioration, they are temporary, and no mat made with wood pulp is suitable for archival use.  Look at the effects of a wood pulp mat on this photograph:

Notice the yellowing and discoloration on the image matted with an acidic wood pulp mat.

Notice the yellowing and discoloration on the image matted with an acidic wood pulp mat.

The finest mats are made with cotton, a fiber that is naturally free from lignin. 100% cotton mats will never yellow, turn brittle or damage your valuable work. Although initially more expensive than the imported mats made with wood pulp, Oak Creek Printworks Bainbridge Alphamats are a good investment, ensuring that your art is protected and will never be ruined by the careless addition of an acidic mat.

When choosing a mat for your work, never settle for “acid-free”. This is a term thrown about so often it has become almost meaningless. Anything can be labeled acid-free, but that doesn’t mean it will last. An acidic wood pulp mat that is sprayed with an akaline coating is called “acid-free”. Yet the acid in the mat will quickly overcome the coating, and it will have worn off even before the mat is used for diplay.

Here are some criteria to use when selecting a fine quality archival mat:

  • Is it made from wood pulp, “high alpha cellulose”, or 100% cotton?      Nothing is as stable and naturally archival as cotton.
  • Is the mat just “acid-free” or is it truly archival?    An archival mat never needs to be processed or coated to have acid removed, as there is no acid to begin with.
  • Are your mats imported from China, or made in the USA?   Don’t be fooled by offers of “acid-free” imported mats that are too good to be true. Our archival mats, in a bright white, cream, black and gray, are made in the US, and cut right here at our studio.

One quick way to check if the mats you have are truly archival  –  look at the bevel (the slanted cut right next to the window of the mat). Wood pulp mats start out with a yellowish core, which quickly turns brown, as shown in these photos. A cotton mat starts out with a bright white core.

On a wood pulp mat, the bevels start out yellow, then quickly turn brown.

On a wood pulp mat, the bevels start out yellow, then quickly turn brown.

Your artwork is your passion. Never compromise or hurt your images with an acidic mat.

Painting and Photography

by guest blogger Jennifer Simpson

www.JenniferSimpsonArt.com

Jennifer-Simpson

My name is Jennifer Simpson and I’m the artist behind Jennifer Simpson Art Photography. I have painted with oils for most of my life and dabbled in acrylics and watercolor. I became serious about photography about 3 years ago with the purchase of a Nikon D-80 which I still use. My current work involves combining my first love – painting – with photography.    I came across the process I currently use rather by accident. I was getting some artwork ready for an exhibit and decided I would print my photographs onto canvas rather than my usual framing,  I never liked framing anyway, it’s a tedious process for me. Once I stretched my photographs onto a wooden frame, I realized that painting the photograph would be a unique, challenging, and meaningful way to present my artwork and express myself.

To explain my process in detail would be nearly impossible as each piece I do calls for a different technique to get across what I’m trying to say. I believe what they all have in common is a certain dreamy, vintage quality though – that and the fact that I only do them in a square format. Each photograph I do is first printed onto canvas, sometimes in color and sometimes in black and white. I then create what is basically a shallow wooden box to mount the canvas on. I line the canvas up onto the wood and gallery wrap it, using a staple gun to attach the canvas to the back edges of the ‘box’. I then flip the canvas over, put it on my easel and start painting. Sometimes I begin with an opaque wash of thinned out yellow paint over the entire photograph to give it a yellowed, vintage appearance. Then I paint the edges with black or brown paint bringing the color down onto the photograph, adding layers and wiping them off until the right amount of color vs. opacity is achieved.

There’s really no specific science to this,  I just kind of go by look and feel. Depending on the photograph I will sometimes create an entirely new background for the subject, painting a sky with clouds behind it or perhaps an ocean view or just completely changing the color, giving it a solid orange background where there once was forest or a wash of subtle blues and greens where there once was a building. At this point, I usually take sandpaper and start taking off the color in places, deconstructing the artwork so to speak.  It is this distressing that gives it texture and further interest. I take off the paint in some places, I even remove bits and pieces of the photograph itself from the canvas.

Dreams-Before-WakingThat-Seventies-SummerLanding

I create my canvases in all different sizes ranging from 10”x10” to 40”x40”. I photograph my painted canvases and make prints from them as well. I recently ventured into doing note cards after it was requested by several of my customers.   To see more examples of my work, you can visit my website at www.JenniferSimpsonArt.com.

Art Fair Necessities: Learn from the Pros

by Georgia Lange

Last month I paid homage to the prestigious Beverly Hills art show known as the “Affaire in the Gardens”. This art show features over 200 nationwide artists and attracts up to 40,000 spectators every fall and spring since 1973. If you are a fan of outdoor group art shows and fairs, Affaire in the Gardens is top of the line. Even the Andy Gumps are swank at this renowned event.

The Affaire in the Gardens art show is almost too prestigious to be labeled an “art fair”; these individuals are not selling candles and clothing. In researching the exhibition guidelines, I learned that all wearable art and accessories (with the exception of jewelry) is strictly prohibited. Although this particular art show may be out of the traditional art fair league, no one can say that its magnificent display methods cannot be used as a model to other artists for other art shows.

How do these artists prepare for a show such as the Affaire in the Gardens art show; how were the booths set up? How was the necessary equipment acquired? What did each artist offer to promote his or her work? This article is specifically geared towards artists who may want to participate in the Affaire in the Gardens art shows in the future, and how one can prepare for application and participation. However, many of the principles discussed here could be applied to outdoor art shows other than the Beverly Hills art show. It is important to remember that every art show has different guidelines, and it is vital to do the research and examine the requirements before beginning the preparation process. Pay strict attention to deadlines and be at least partially prepared before applying, and remember that what applies to one show may not apply to another.

Click here to see full pdf article

The Art of Giving Art

by Georgia Lange

The holiday season is here, and many of us are struggling to find gifts for our loved ones. The solution to this problem is an easy one; the gift of art is priceless. In the past, I have often found myself hesitant to give my art as a holiday gift to a loved one. I was concerned that I was not valuing my own work, or that I was imposing my own sense of taste on someone else. I have come to the conclusion that this is nonsense. The truth is that people love collecting art, and when the art comes directly from you (it is your creation), it is truly special, unique, and personal. What could possibly be more valuable?

Prints make great gifts for anyone who is special to you. You can dress up your prints by matting them and placing each print in a protective plastic sleeve. Trust me; this is a classy gift and can be very cost-effective. Here at Oak Creek Printworks, we offer a package deal that includes the mat, back, and plastic sleeve. Depending on the size of the print, you can keep your costs under $20 per person (which is not easy to do! I usually can’t find great gifts for less than $30 per person, and even then it is difficult!). Ease your holiday headache; give art! You won’t regret it, and it will be a welcome gift to whoever receives it!

CreamMBBCombo

AN ADDITIONAL NOTE: EARNING THE MONEY TO SPEND ON YOUR GIFTS

Over Thanksgiving, I was surprised not only by the abundance of savory dishes that were prepared by friends and family but by the onslaught of inquiries as to how to purchase prints of my work for the sake of holiday gift giving. Remember: you have friends, and your friends have friends. Those friends give and receive gifts too. Since we tend to establish friendships with like-minded individuals, it is not surprising that our friends’ friends often have tastes similar to our own. Your art not only makes a precious gift for you to give, but for others to give too. This is a great opportunity for you to earn the money to spend on your gifts this season, and then some.

Establishing an online presence where people can view and purchase your work is extremely beneficial. Etsy, a site geared towards all things handmade, is a great way to set up your work for sales. Another great site geared towards artists selling their work online is Big Cartel. Check these sites out as soon as possible, and figure out what will work best for you. Then make the necessary phone calls and emails to your friends and acquaintances and let them know what a wonderful gift your art would make for someone they know, and where they can purchase it easily online.

Be kind this holiday season, and let the season be kind to you.


Ordering Greeting Card Sleeves

Protecting your greeting card artwork is easy with protective sleeves. However if your card size is not one of the standard* card sizes – A2, A6 or A7 – you may have some difficulty ordering the right size sleeve.

To be sure your card will fit, you can do what Shirley D’Agati did last month. Just send us a sample of your card and we will pick out the sleeve that fits your needs. We will then call you or email you with the final details of the order before we fill it.

D'AgatiCard72dpi

“Big & Little”
Original Oil Painting on Canvas
by Shirley J. D’Agati


*Standard Card Sizes:

A2 Cards – 4.25″ x 5.5″
A6 Cards – 4.625″ x 6.25″
A7 Cards – 5″ x 7″

Standard Envelope Sizes:

A2 Cards – 4.375″ × 5.75″
A6 Cards – 4.75″ × 6.5″
A7 Cards – 5.25″ × 7.25″