by Mackenzie Billing
Making a 16-month personalized calendar for friends and relatives is a really creative, fun way to say “thinking about you!” They make such perfect gifts, and summer is really a great time to get started so that the calendars will be ready as the school year begins.
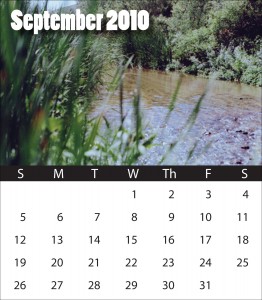
I recently wanted to make a calendar for my older brother, a photographer, with the wonderful pictures he had taken over the years. First, I did a full-sized 16 month calendar, starting in September of this year and running through December of 2011. That way there was room for more of his pictures and he could start to use it sooner.
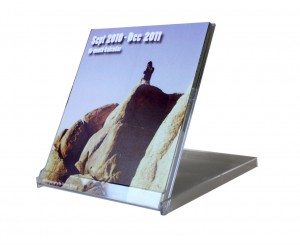
 Later, I experimented with calendars in a variety of sizes and formats. During the calendar-making project, I discovered a way to use a special, clear plastic stand the size of a CD jewel case to create a fun little desk calendar. This can be done without using a commercial printer or binding of any kind. It stands upright and has a little slot to put all the pages in. A calendar this small is more for just checking off the days as they go by and doesn’t really leave much room to write. I think it’s a handy little calendar just to sit on a desk with pictures of the family, nature, pets, animals, or whatever is meaningful to the recipient of the gift. It can be anything you want! It’s almost like a miniature photo frame that you change every month! What a great gift.
 I created the calendar in InDesign, but Adobe Illustrator, Microsoft Word, Publisher, Excel, or virtually any program that uses tabs or tables can be a useful calendar creation tool. If you decide to make a calendar, you should first, determine the type of binding it will have. A calendar that has saddle stitched (stapled) binding requires a different page layout than a calendar bound with a wire or plastic coil.
Gathering the photos and deciding how they should be placed on the page for the jewel case calendar was lots of fun, but I really dreaded setting up the dates for all those months, that is, until I learned a simple little trick.
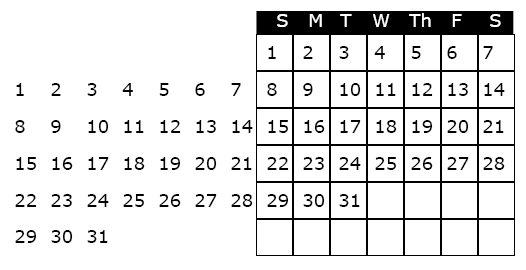
Begin by creating a paragraph with 14 tab stops using an alignment of your choice. Use these paragraph settings to create an array of numbers which you will later duplicate and use on each of the subsequent months. The size of the typeface and amount of leading (space between each line) in the array depends on the rectangular area used for each day.
Begin the first line in the array by pressing the “tab key” seven times, which advances the cursor halfway across the paragraph to the correct position to begin numbering with “1,” creating the array of numbers as shown.
 If desired, create a grid, or table to separate the days. To create the grid, use the table tool, or create a rectangle that is the same width as your tab set, and depth equal to the leading. Use the “step and repeat” feature to duplicate the squares. Virtually all programs let you duplicate using the copy/paste commands, but some employ a printing technique called step and repeat. This handy feature lets you create an array of precisely positioned rectangle in two steps, one for columns, the other for rows.
When the grid is completed it should look something like the illustration below, with your design.
To use the calendar in a document, highlight the unused dates and make the type the same color as the background (usually it’s white, i.e., no ink printed, so that one can write in the grid), or create a shaped filled with the paper color to “mask” the unused numbers.
To create the calendar for subsequent months, select the number grid, slide it into the appropriate position and white out the unused numbers.
Hope this technique saves you some time and frustration!

