Tag Archives: Photography

Flair Magazine Annual is Back in Print

Flair Magazine 1953 Annual

Left is the original 1953 Annual, and right is a reprinted compilation of the critically acclaimed magazine.

While out and about last weekend I happened to wander into a Barnes & Noble bookstore.

As usual, I found myself in the Graphic Design section, and my attention was immediately drawn to a large red volume on the top shelf.

Pre-ecommerce, I had searched unsuccessfully for another copy, wondering if the magazine had been published for more than just one year. The volume in B&N was confined in a clothbound box and shrink-wrapped, so there was no opportunity to browse its pages.

Knowing Flair was again available, I checked it out on Amazon. Still, no opportunity to flip through the pages but with plenty of copies available, I snatched up a cheap one just so I could cut out the uniquely designed and printed pages.

Flair was quite innovative and was said to be “the first magazine that became an art form,” featuring the work of Salvador Dali, Matisse, George Bernard Shaw and Walker Evans to name just a few.

According to the Amazon description of the new publication, “this facsimile edition offers the same ingenious bookmaking of its predecessor, including multiple gatefolds with die-cuts, booklets, and accordion folder leaflets.”

If you’re a fan of uniquely printed art, you might pick up a copy of the Flair Annual 1953 while it’s still available.

Delicate Balance

This image was cropped to a square to ready it for a square greeting card design.

This image was cropped to a square to ready it to print a square greeting card.

A tiny flying insect that I called a “fairy-fly” landing on the flowering Nandina, aka Heavenly Bamboo, inspired me to do a quick photo shoot on my lunch hour last week.

“No matter the time you live, no matter who, or what you are, every one and every thing is in delicate balance.” Should I add typography to this image? What words? Different words? The jury is out. What do you think?


Analog Selfie circa 1984

analog-selfieSelfie may be the Oxford English Dictionary’s 2013 word of the year, but photographers were taking “selfies” long before Smartphones and tablets.

In fact, selfie’s have long been a subject of photographers, painters, writers, and artists of every ilk. Selfies are and always have been a means of self-realization, as well as self-expression.

In this 1980’s Throwback Thursday image, I was snapping a selfie before I realized. At the time I was photo editor of The Reporter, Moorpark College’s student run newspaper, and the image was part of a self-portrait series by John Grzywacz-Gray, photojournalism advisor to the Reporter.

Broaden your vision with panoramas and apps

Bryce Canyon National Park in Utah takes on an other-worldly landscape, captured here in 11 different photos. I walked away from the computer for a couple of hours while Photoshop’s Photomerge toiled away. The composite yielded a file nearly a gigabyte in size with a remarkable amount of detail. The sweeping landscape’s curved edges may bother some, but, in my opinion they add to the drama.

Bryce Canyon National Park in Utah takes on an other-worldly landscape, captured here in 11 different photos. I walked away from the computer for a couple of hours while Photoshop’s Photomerge toiled away. The composite yielded a file nearly a gigabyte in size with a remarkable amount of detail. The sweeping landscape’s curved edges may bother some, but, in my opinion they add to the drama.

Looking to make your images unique? Want to see things from a new perspective? Try experimenting with Photoshop’s Photomerge feature or AutoStitch app to combine numerous images into a single wide angle view. It’s all automated. Just select the images you want to merge, sit back, and let Photoshop do the rest.

buckwheat and bee
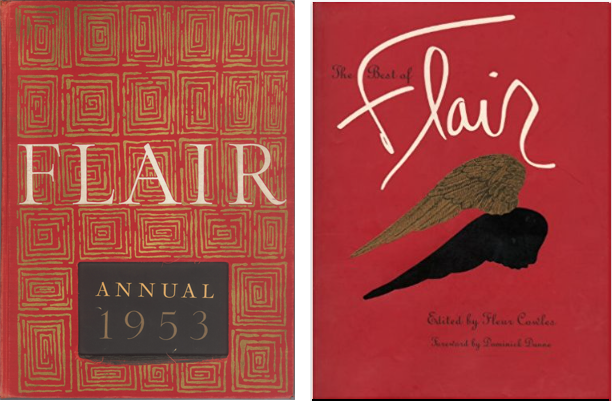
Perhaps you’re looking for something a little more retro. Thanks to the new digital cameras and Smartphones, we’re able to capture well-lit, sharp focus images, so what’s the big deal? Anyone can take “nice” pictures these days. So, let’s look at images differently and carefully mess them up like we used to do by accident.

After reviewing my photos of the busy bees, I realized that the plants they were all attracted to were buckwheat plants. So, I decided to grunge up the photo with an app and create the masking tape label with “B is for…”, surprise, not bee. Two apps were used in the creation of the photo—Pic Grunger and Labelbox.

Want to learn more about the phone apps? Check out former OCPW featured artist, Holly Higbee-Jansen’s Photographic Explorations. Here you’ll learn about Holly’s favorite phone apps, as well as online and in-person workshops and photography coaching.

Drawn to Color

beach front property

Just what was it about this old, weather-beaten shack that kept pulling me back to it, as if by some mysterious, invisible force?

It is one of my favorite photographs from a recent trip to the Caribbean. Okay, I know that seems a little weird, at least I thought so, because in the Caribbean there is a beautiful landscape-seascape at every turn, and so much Color.

In addition my work here at Oak Creek Printworks, I teach Publishing and Prepress as well as the Adobe Create Suite at Moorpark College, a local community college. This prompted me to sign up for the Adobe Creative Cloud. For a flat monthly fee, I now have a “virtual desktop” on the Adobe Creative Cloud Server. There I have access to, not only all of the latest versions of the programs in the Adobe Creative Suite, but easy access to a myriad of tools and videos that help with all things Adobe.

Adobe Creative Cloud Dock

One of the tools on my Creative Cloud desktop is a section labeled “Colors,” where Kuler (pronounced “cooler”) performs an “extraction” on the uploaded image. The extraction draws colors from the image and displays a color palette like the one in the illustration above. The new swatches can then be downloaded and used in the Creative Suite programs. I loaded the Adobe Swatch Exchange (ASE) file into Photoshop and used the new color swatches (the last 4 in the palette) to quickly work color into the “Beachfront Property” headline and background. I selected a typeface the felt like it belonged to the old shack…and that’s when it dawned on me.

Not only was this the identical color palette I had recently chosen when redecorating my kitchen, but it is a color palette that has been recurring in many important ways since my earliest memories, beginning with summer beach vacations, and the colors of my favorite room in my early childhood home. I relate to these colors in a profound way. You might say I’m drawn to them.

So I think these particular colors have just a little to do with my emotional attachment to this out-of-focus, tightly cropped image, which I intend to make into, well, something. Beyond that tiny bit of subjectivity, I will not critique this photograph any further. I’ll leave that to anyone who has read this far!

Not Another Green Marble Background?

For a designer, creating a new look for a green marble background is like bringing out the old bell-bottoms and believing they look as cool as they did in 1969.

Filling a “simple” request can be not-so-simple if you make a lot of blind starts, like spending an hour hunting down an old CD filled with stock marble images, just to find they are in an outdated graphic format.

A second blind start—searching stock images—another hour easily wasted as I realized, why not create an original image? Not only can it be easy, but the price is right. We refurbished our kitchen a few years back, and while out searching for the right granite counter top, I took plenty of photographs of the various granite and marbles, but none were green. Take them into Photoshop, and with a couple of well placed clicks I was able to turn my images into perfectly suitable green marble backgrounds.

gold marble

This is the original photograph of the marble.

green marble

By applying levels to increase the image’s contrast, and then applying a hue and saturation effect, the result is this rich, green marble-like background.

There are only two steps to go from the original photograph of the gold marble to the green. First, I created an adjustment layer for “levels” to increase the image contrast. The adjustment layers are forgiving in that they allow you to manipulate the data at any time without destroying any of the original pixel information.

The second step is to create and adjustment layer for “hue and saturation.” There are three areas that can be changed within the H&S palette, but before changing anything, click on the “colorize” button. This extracts all the color from the image, assigning a default hue to all the pixels, while maintaining their original values.  Next, the hue slider cycles through the “rainbow” — ROY G. BIV (red, orange, yellow, green, blue, indigo, violet) — stop at the desired green hue. The saturation slider adds or subtracts color, and finally the bottom slider lightens or darkens the values.

Of course, to achieve the desired result might require additional steps, depending on the nature of the original image. You might want to add additional layers of color, transparency, contrast, and texture to create a unique effect.

If you want to create a library of backgrounds and textures, do it yourself. Textures exist everywhere, and for every photograph you take, you can manipulate it in an infinite number of ways.

With today’s image editing programs, you don’t have to mortgage your home or rent out your kids to afford amazing software. I’m currently experimenting with an app called Pixelmator, a $15 Photoshop wannabe, and after half an hour of playing (and they call it work), I can say it’s certainly worth the investment. In fact, I’d recommend Pixelmator to any of my beginning design students who have a newer Mac, but can’t afford Photoshop. This app works on my iMac, now that I’ve upgraded to Lion, but Pixelmator will work with OS10.6 or later. With a little coaxing, I could be persuaded to show and tell more about this cool app, Pixelmator.

Architecture and Graphic Design Play Off One Another

Montreal Condos

Condos on a small island strip in the middle of the St. Lawrence River.

Each time I travel I make new discoveries, and often, insights and inspiration comes only once I’m back home and have had a chance to unwind and process the whirlwind adventures.

On this trip which began on the St. Lawrence River in Montreal, Canada, I became particularly focused on the art and design in architecture (probably because there wasn’t much wildlife or sport activities in our itinerary). I found the range in age and architectural styles to be visually stimulating without appearing to end up in a hodge-podge of visual clutter. Continue reading

I’m a Photo Horder

unedited octopus

I was pretty sure that among the 200-some-odd photos I had taken, there had to be an octopus somewhere.


octopus, starfish

By opening up the shadow areas and toning down the highlights in iPhoto, the values are redistributed to more closely resemble the actual scene. However notice the reflection in the lower left quadrant of the screen.

In the small dark cavern, I would have completely missed the fact that the octopus was there at all had I not made the quick adjustments that open up the shadow details. I performed the adjusted preview in iPhoto on my Macintosh, but Microsoft’s comparable software is Windows Photo Gallery.

I learned lots of valuable lessons in photojournalism classes, many long forgotten, but a couple of lessons really stuck. Thirty years ago when, as students, we were advised to Shoot a lot, our biggest complaint was the cost of film.  Today, the cost of digital equipment pales when compared to film and processing costs, so I was surprised to learn that one of my companions on a day-long adventure to the Aquarium of the Pacific was throwing away photos after she previewed them on her iPhone, deciding they didn’t “turn out.” I wondered how it was possible to make such a quick decision about the images under such poor conditions and on such a small screen.

The next day, I showed my companion a rough edit slide show of my 230 images. I put them up on the big screen tv. She, on the other hand, had only 13 images, which we viewed on her iPhone. Granted she’s not a fanatic like me, and didn’t shoot as much as I did, but I can’t help by thinking about the photos she threw away. “What if there were details in the image that she missed on the small preview screen?” I wondered. “What if she could adjust her lighting after the fact?”

The reflection in the previous images has been replaced using the “content-aware” feature in Photoshop.

My first task after downloading photos to the computer is to make preliminary adjustments to the tonal values in the images. It’s a relatively “quick” and painless process, and I finished this batch in about 2 hours, or about 30 seconds per image. Unless you are serious about photography, you might unwittingly skip this most critical step, so that’s where the hording comes in to play. Don’t throw away any photos before you perform a quick adjustment to the image’s tonal values.

In the edited photo, the reflection in the lower left is more obvious than before, so I bring my photos into Adobe Photoshop where I make all the actual refinements and adjustments. To eliminate the glare, I made a feathered rectangular selection and filled the area using the “content-aware”  feature, which gathers data from nearby pixels to simulate the surroundings.