Category Archives: Displaying your art

Display greeting cards on 3-tier rack

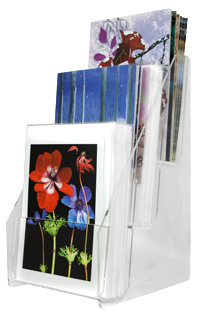
A7 card rackMore card and print displays are arriving here at Oak Creek Printworks weekly. We recently added a 3-tier clear acrylic card rack to our existing displays in order to provide an alternative to the larger, more expensive greeting card spinners. The 3-tier rack provides pockets that measure 5-5/8″ wide, and are 1-1/2″ deep.

If you want to display standard A7 greeting cards and an A7 envelope packaged in a clear plastic sleeve, each pocket comfortably holds 18 individually packaged cards, for a total of 54 cards in the entire rack. With an outside dimension of only 10-3/4″ high, 6-5/8″ deep and 5-3/4″ wide, the card display occupies only a small area of counter or table space. Its modular shape invites a companion rack. Place two, three or more racks side by side for more display space. Because of its versatile sizing, the display works equally well for 5″ x 7″ or 5-1/2″ x 8-1/2″ postcards, booklet, books, brochures, DVDs and more.

During this holiday season, artists and crafters are preparing greeting cards, note cards and a wide range of stationery items for boutiques, craft fairs and art shows.  Selling small prints, greeting cards and bookmarks gives artists and crafters a way to market their work and provide visibility to a select audience of people, and a lightweight, compact display is a great way to show your cards.


Glass and Plexiglass – A primer

by David Heyman

Many artists, photographers and creative people choose to frame their own artwork, saving lots of money over the costs of taking pieces into a frame store and maintaing a greater degree of control over the finished work. When framing a work on paper or any more fragile items, a glazing is needed to protect the work from damage and the effects of dust, sunlight and humidity.

Nowadays, there are so many glazing options to choose from, it is easy to get confused on which type is appropriate for your needs. Here is a Continue reading

Cardmaking: Creating depth with cutouts

by Nancy Haberman

Recently I assisted a colleague who was learning the finer points of Adobe Illustrator’s pen tool. Our goal was to create images that would adorn products related to the sea. The resulting artwork of a seahorse was intricate and stunning, and a discussion followed about using it on a greeting card.

Commercial greeting card publishers have forever pushed the envelope when it comes to greeting card presentation techniques, relying heavily on high end print and print finishing processes. While holographic and lenticular printing are too pricey for the average working artist and crafter, other finishes like die cutting, embossing and engraving are now within reach of those willing to invest in new desktop equipment and take the time to learn how to use it.
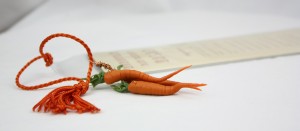
The desktop publishing revolution turned artists and crafters into self-publishers. Fast forward 25 years later, and a trip to Border’s, Target or any greeting card store reveals that it takes more to excite the eye of a card buyer in 2010 than cheap two-dimensional Photoshop effects, long ago passé. Continue reading

Public Workspaces As Galleries: A Public Arts Controversy

by Georgia Lange

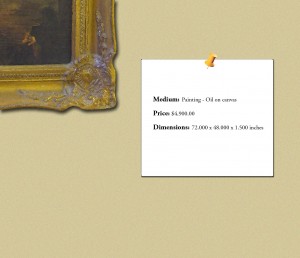
When public workspaces operate as “part-time galleries” by exhibiting artwork on a rotating basis, it can become a controversial public arts issue. Most public workspaces (hospitals, hotels, city halls, banks and offices) typically buy or rent the artwork that is chosen to be put on display. It is often not local or original art, but “decorator” art that is deliberately chosen to fit the design and colors of the interior of the building in question. Because this is typically the case, many artists are fundamentally against the idea of allowing public workspaces to display their work for  “exhibitions” without providing advance compensation.  It is a rare exception for a public workspace to consistently exhibit artwork on a rotating basis, but it does happen. When it does, the issue of displaying prices on the works being shown becomes more complicated than one might assume. Continue reading

Body of Art Contest: Win up to $2500!

Aaron Brothers is currently having an art contest called Body of Art! Using pens, paint and markers, artists get to let their creativity loose on clothing including t-shirts, jeans, shoes, and hats. Get involved, get creative, and take a 4 x 6 or 5 x 7 photograph of your original, one-of-a-kind wearable art to your local Aaron Brothers for a chance to win a $2500 Gift Certificate! Entries are due by September 25, 2010. Click here for more details.

Bookmark Genius: Recipes for Success

by Georgia Lange

Two of my favorite things to do this summer have been reading and cooking, which I rarely have time for during the rest of the year. Something about feeding both my body and my brain makes me feel at ease with everything, as though I am on vacation from life even when I am home. As I was sitting around the other day, munching on a delicious Moroccan salad that I had prepared and reading The Girl with the Dragon Tattoo (a fabulous book that everyone in America seems to be reading this summer), my mind started to wander a bit. I remembered that I needed to write down the recipe of the savory dish Continue reading

Personalized Calendars – Easy to make, perfect for gifts

by Mackenzie Billing

Making a 16-month personalized calendar for friends and relatives is a really creative, fun way to say “thinking about you!”  They make such perfect gifts, and summer is really a great time to get started so that the calendars will be ready as the school year begins.

I recently wanted to make a calendar for my older brother, a photographer, with the wonderful pictures he had taken over the years.  First, I did a full-sized 16 month calendar, starting in September of this year and running through December of 2011. That way there was room for more of his pictures and he could start to use it sooner.

Later, I experimented with calendars in a variety of sizes and formats. During the calendar-making project, I discovered a way to use a special, clear plastic stand the size of a CD jewel case to create a fun little desk calendar. This can be done without using a commercial printer or binding of any kind. It stands upright and has a little slot to put all the pages in. A calendar this small is more for just checking off the days as they go by and doesn’t really leave much room to write.  I think it’s a handy little calendar just to sit on a desk with pictures of the family, nature, pets, animals, or whatever is meaningful to the recipient of the gift. It can be anything you want! It’s almost like a miniature photo frame that you change every month!  What a great gift. Continue reading

Greeting Cards Reign Supreme in 21st Century

by Nancy Haberman

"Sunrise" by Jennifer Simpson

If you are reading this post, you are living in a world driven by technology. Paradoxically, there has been a trend in art and graphic design towards “things handmade,” or anti-technology. Where once a graphic designer strove to make designs and typography more perfect and mechanical, new designers rebelled by distressing type and creating designs that appeared constructed and hand crafted. If you are a reader of any of the Stampington publications, particularly Stamper’s Sampler and Take Ten, you’ll find examples of some of the finest rubber stamped and hand crafted greeting cards that I’ve seen by crafters in the western hemisphere. Complex designs using mixed media have found a home in the greeting card, even if they do use basic elements created by others.

Twenty-first century creative individuals have growing access to Continue reading

Easy photo mounting

By David Heyman

One problem that can arise when displaying photographs is the appearance of wrinkles and bubbles in the print over time. This is caused by changes in temperature and humidity affecting the paper, as well as the effects of gravity pulling on different areas of the image to different degrees, causing warping and wrinkles. This can happen whether your photographs are in mats, gallery presentation packages or have been framed.

For a smooth, flawless surface, photographic prints need to be mounted to a sturdy board. While dry mounting produces excellent results, it is expensive and requires large, heavy equipment, or time consuming trips to the custom frame store. An easier method, that you can do yourself at home, is to mount the prints on a self adhesive mounting board, such as Crescent Perfect Mount.

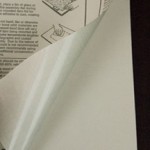
Simply place the board on a flat, clean surface, peel off the liner paper, then place your print squarely on the mounting board. If the print is large you need to start from one side, and work your way down the print, making sure there are no air bubbles trapped underneath the paper. Cover the mounted print with the liner paper, and apply firm pressure, from the center towards the sides, to release any trapped air.

Put a weight on top of the package for 24 hours, and then your print is ready for display.

What is a Protective Closure Sleeve?

By David Heyman

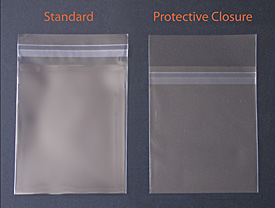
Crystal clear sleeves have an adhesive strip to seal the bags against dust, dirt, bugs and fingerprints, keeping your greeting cards and photographs in pristine condition. This adhesive strip is the key difference in a protective closure style sleeve.

Standard and protective closure sleeves

With standard sleeves, this adhesive layer is on the back of the flap. Simply pull off the cellophane liner, fold the flap over and the bag automatically seals. This works well for most uses, as the sleeve is protecting your contents, while allowing for removal of the item if necessary. Your cards or photos can be changed out, as the sleeves can be re-sealed several times. Continue reading